DIY Online Birthday Invitation with a Countdown
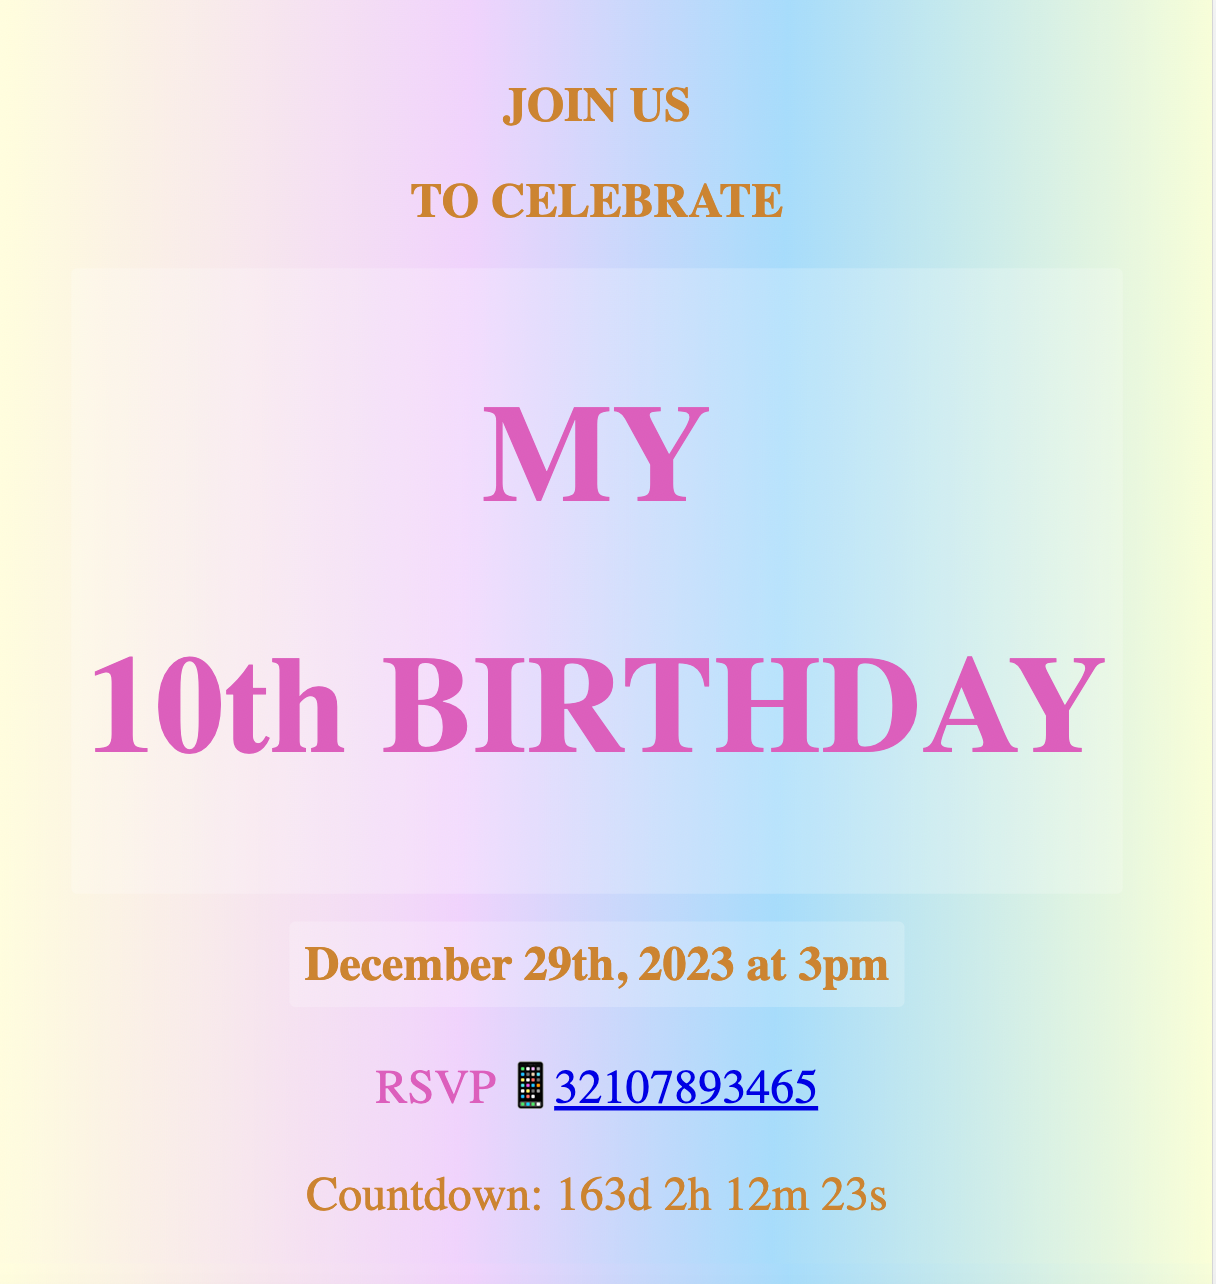
Get a sneak peek of how the invitation looks! Coded by Váleri Calhau
Welcome to our DIY Online Birthday Invitation with a Countdown!
In today's rapidly evolving digital age, exposing children to coding early on can empower them with problem-solving skills and creativity. Join us in this fun and innovative project that allows your child to design their personalized birthday invitation while learning the basics of coding.The way we connect and share special moments is rapidly evolving. So, why not expose them to coding now, setting the foundation for a bright future of learning, exploration, and curiosity?
☑️ Customization Guide
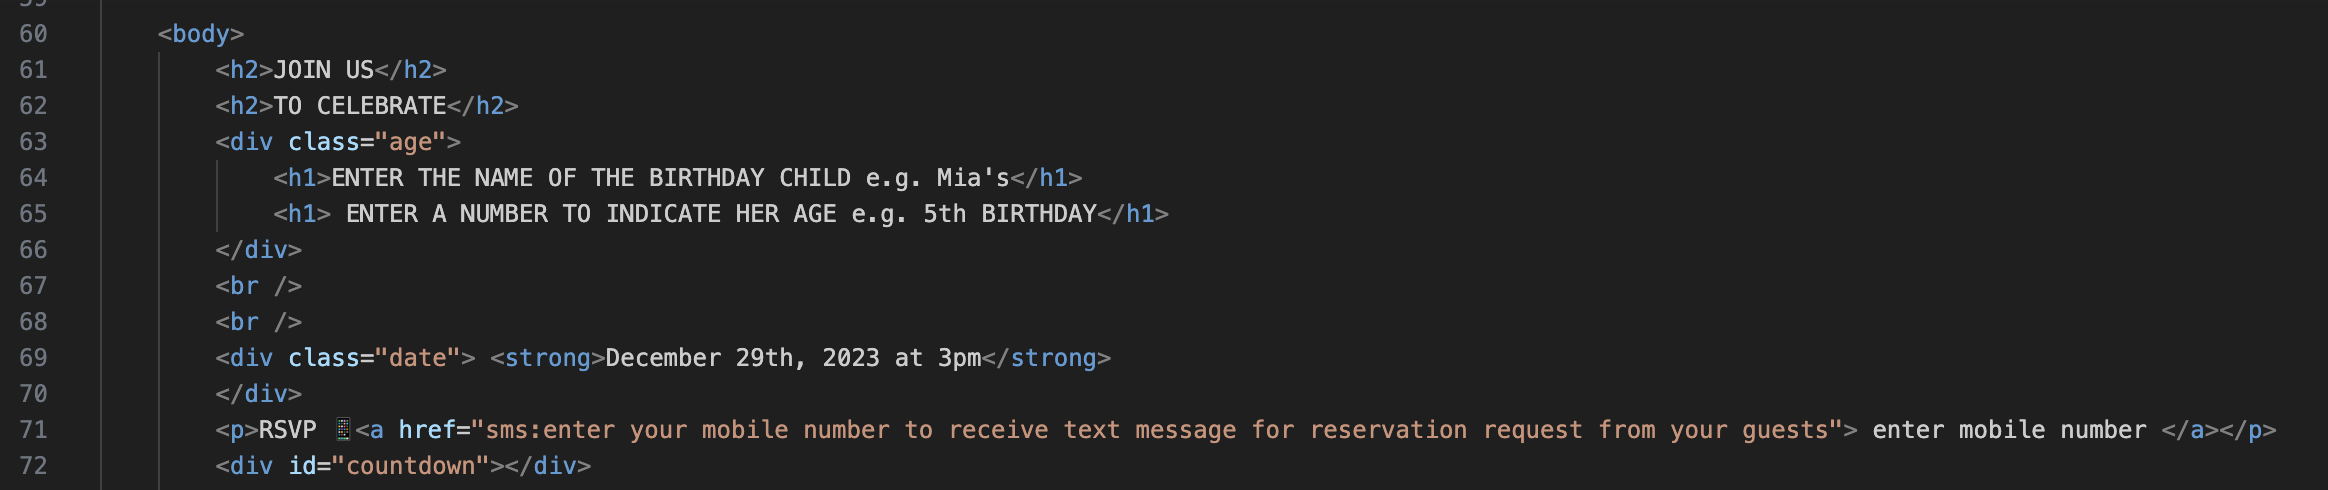
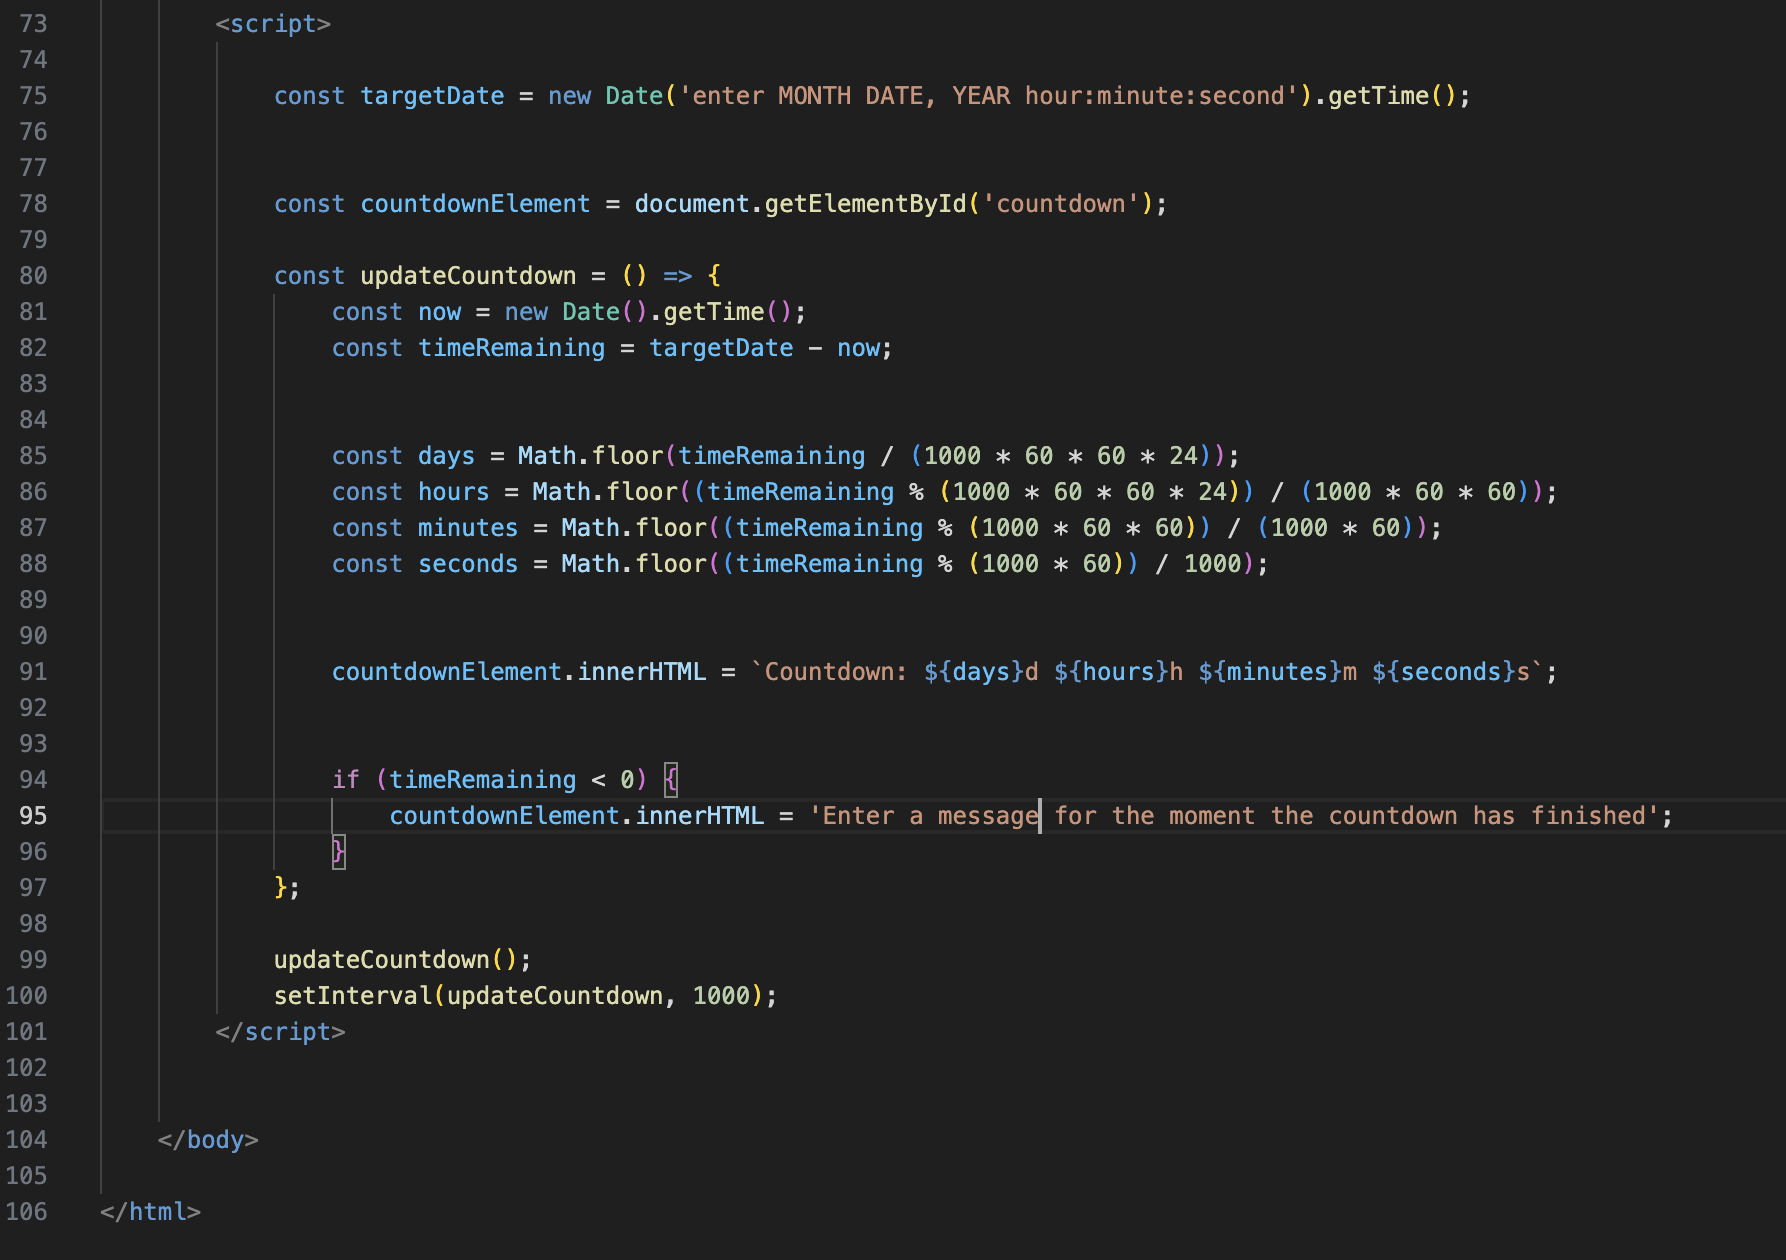
- Update the birthday party date and time.
- Change the child's name.
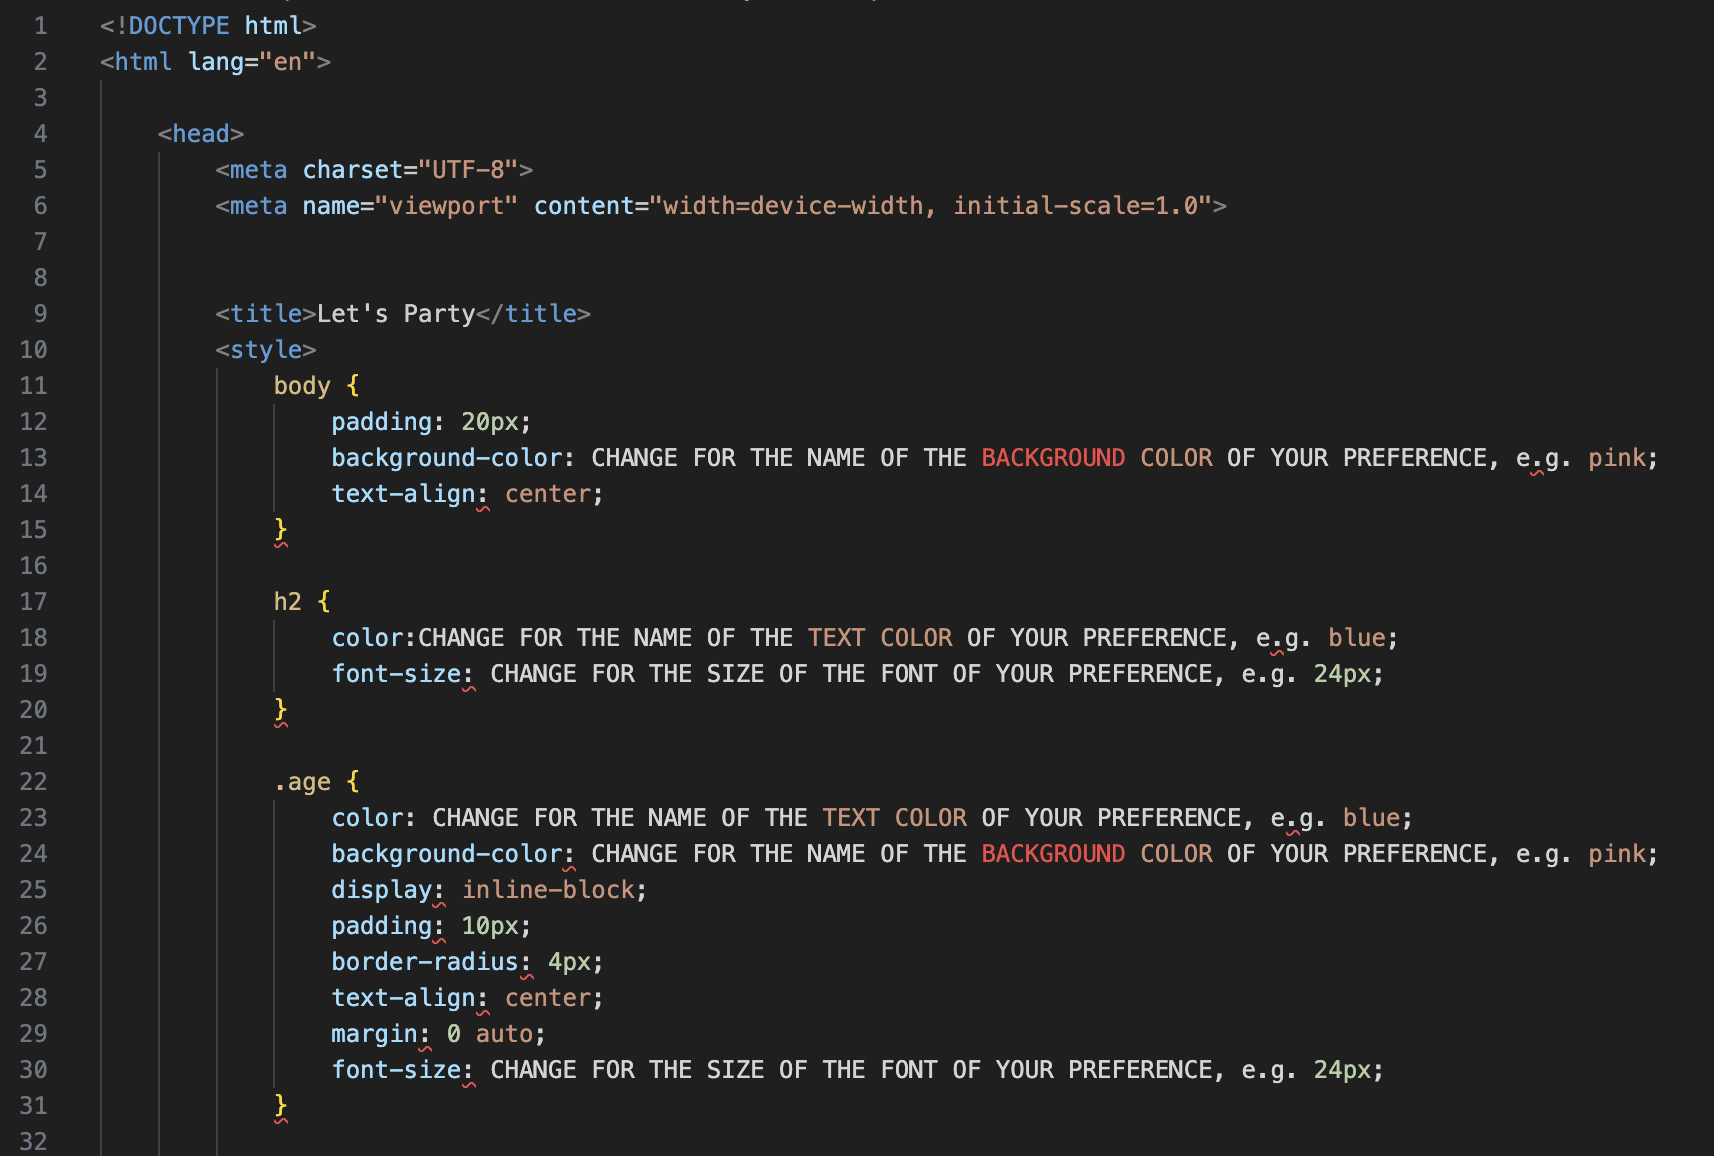
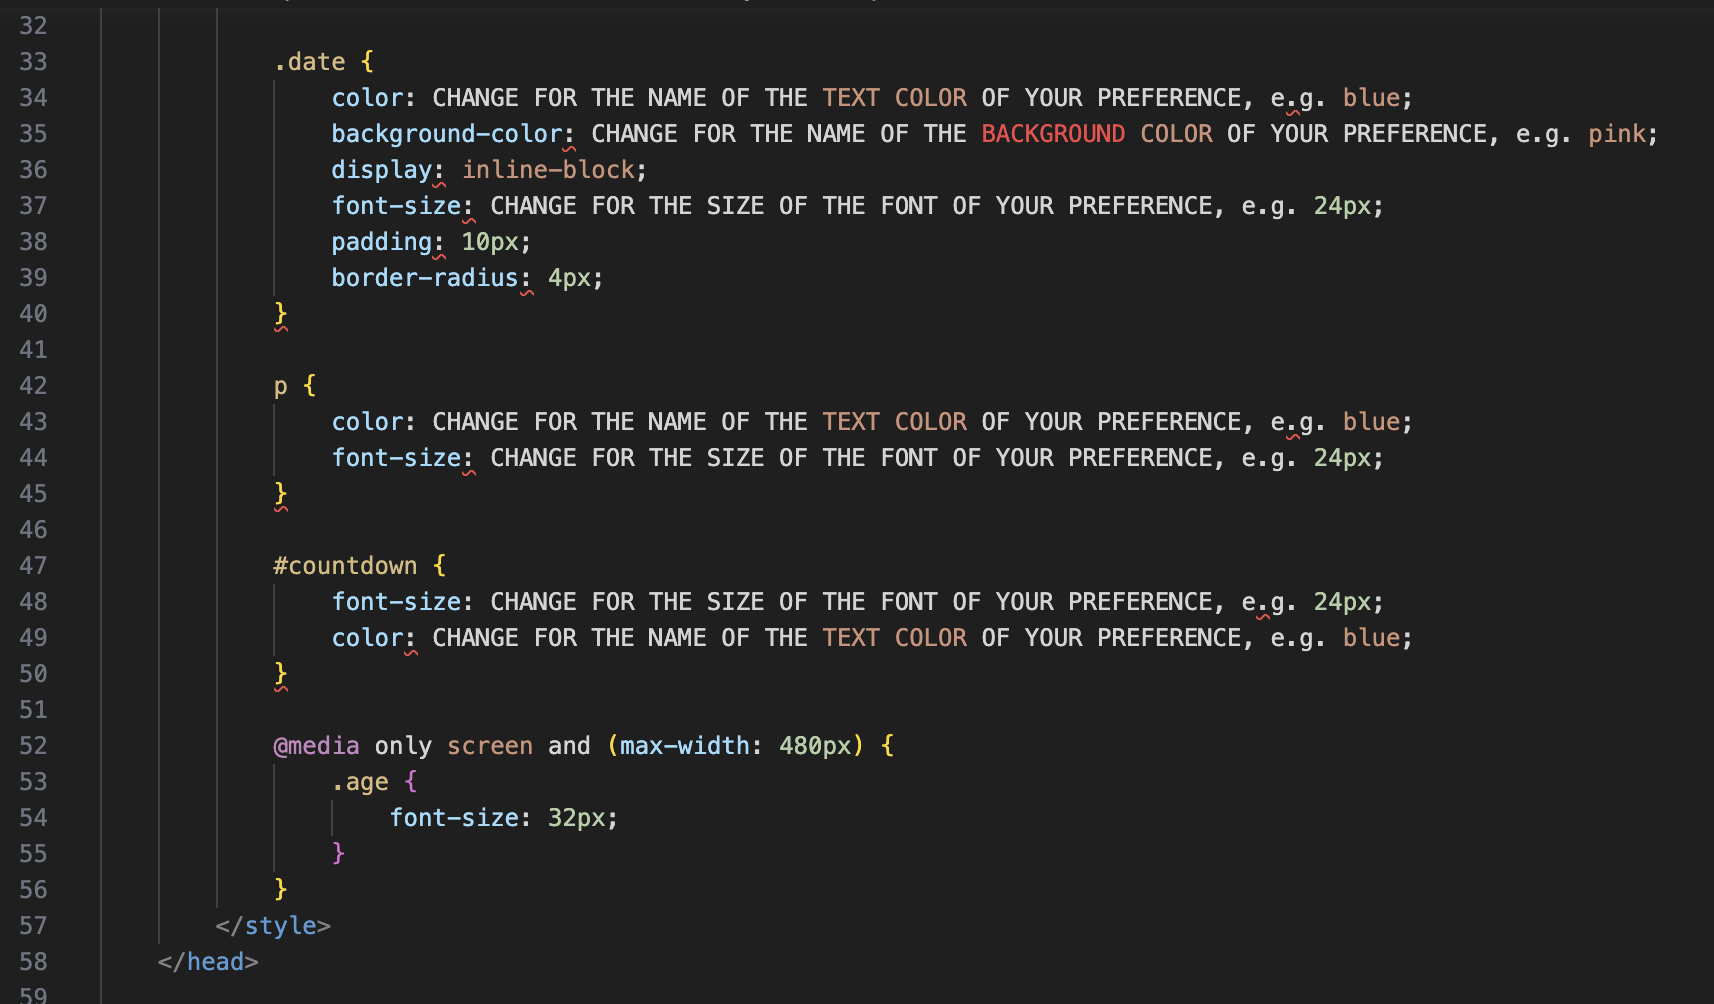
- Customize colors and font sizes to match your preferences.
- You can also experiment with gradient backgrounds for a unique look! Visit SheCodes to find beautiful gradient combinations for your invitation background.
- Modify the mobile number to be clickable, directing guests to a text message when clicked.
- Modify message for when the countdown has finished.
- Use the provided screenshots as a guide.
Fear not, the code is provided and it is open-source!
🌐 A Website to Share
The best part is, once they create their personalized birthday invitation, they will have it in a website format! They can easily share the invitation with their friends and family by sending them the website link. Imagine the excitement of inviting guests to a birthday celebration with a unique webpage designed by the birthday boy or girl themselves!
☑️ Step-by-step Guide
1. Download Visual Studio Code (VS Code) and install it on your computer.
2. Open VS Code and create a new file named "index.html" (all lowercase, no spaces).
3. Copy and paste the code from Github into the new file in VS Code.
4. Customize the code to your preferences.
5. Save the file (Cmd + S on Mac, Ctrl + S on Windows).
6. Open Google Chrome and click "Open File" in the menu to select the index.html file you saved.
7. Create a new folder and drag & drop your index.html file into it.
8. Your personalized invitation webpage will be visible in your browser.
Make sure to save the code in VS Code and reload the webpage in Chrome after making any changes.
Made with Love for Visual Learners: Video & Images
🚀 Launch! Your Custom Birthday Invitation Website
🎉 Great job!
You've customised the appearance of the birthday invitation by making changes to the background color, text color, font size, you added your name, your party date and a mobile number. You have even created a personal message for the day of the party! Now that your invitation looks perfect, it's time to host it.
If you don't have a Netlify account, now is time to sign up for a free account. On 'Add new site' click on 'Deploy Manually' to upload the folder or to drag and drop. Once the deployment is complete, Netlify will provide you with a unique URL for your hosted birthday invitation. Share this URL with your guests so they can access the invitation webpage.
🖥 Exposure to Coding Languages
💕 Creating personalized birthday invitations with your child can be a wonderful and enjoyable experience for both of you! As parents, you have a unique opportunity to bond with your child and foster their creativity. Letting your child choose the colors and font sizes not only empowers them but also adds a touch of their personality to the invitation.
🛟 Every child is different, so it's essential to tailor your approach based on their independence level. Some children might need more guidance and assistance, and that's perfectly okay! Be patient and provide support when needed, typing out the details they want or helping with the technical aspects. On the other hand, some children might be more hands-on and eager to explore. Encourage their enthusiasm and let them take the lead in designing the invitation.
💎 Remember, the most important thing is to have fun throughout the process. The joy and excitement you both share while crafting the invitations will make the event even more special and memorable. Embrace this creative journey together, and you'll create not only beautiful birthday invitations but also cherish wonderful moments with your child.
🌈 Embrace Individuality
💻 By involving your child in this creative project, they will also get a chance to be in contact with coding languages. As they grow, they will become more familiar with coding and find it less daunting. This early exposure to coding can lay the foundation for their future learning and exploration in the digital world.
⌛️ Include the countdown to the big day on the invitation, and watch the excitement grow as the special date approaches. Your child will love being part of the creative process and sharing their personalized invitation with friends and family.
Give yourself a pat on the back for developing a webpage!
Showcase Your Invitation on Our Website!
If you would like to have your personalized birthday invitation showcased on our website and shared with others, we'd love to feature it!
Take a screenshot of your invitation.
Send the screenshot to 📨 my email with the subject "Birthday Invitation Showcase."
Please note that for privacy reasons, we kindly ask you to blur or hide your mobile number in the screenshot before sending it to us.
We can't wait to see your creative designs and share them with our community.